Copying, printing, scanning
Public Copying, printing, scanning
In the public areas of the Viadrina and in the University Library there are printing and copying machines that you can use with your chip card.
How to use a multifunctional device: a step-by-step guide
Multifunction devices are your all-round helpers for copying, scanning and printing. Follow these simple steps to get the most out of your device:
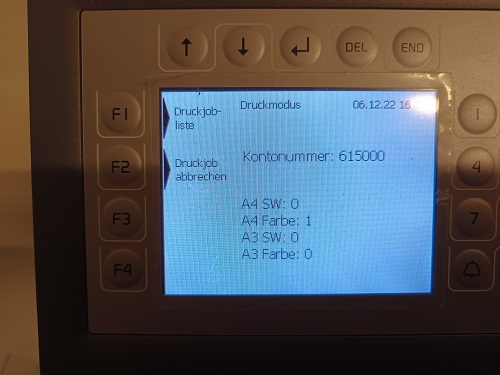
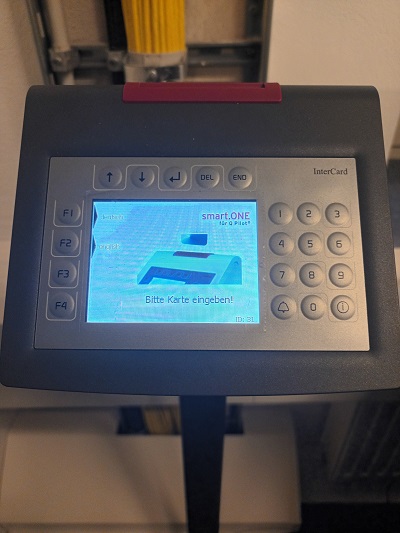
Go to a multifunctional device in your neighbourhood. Insert your chip card (student or employee ID card) into the red card slot without pressing it. The direction of the card doesn't matter - just insert it!
- 2. select cost type
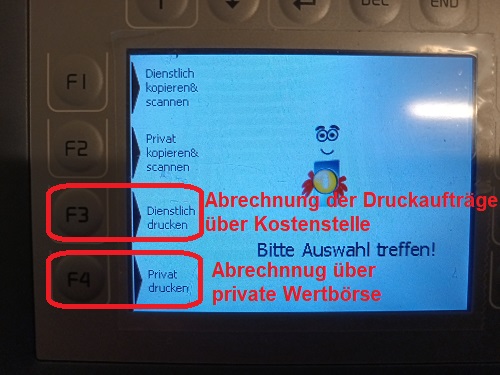
Two billing options are available on the device display:
F1: Settle costs via a business cost centre.
F2: Settle costs via your private wallet.
- 3. define cost centre (for settlement via F1)
If you have selected "F1", you can now select the desired cost centre. If you only have one registered cost centre, this will be displayed automatically.
- 4. Access to the touchpad
After selection, the touchpad of the multifunction device is activated. Tap the desired function on the display - in this case: "Copy".
- 5. Customise copy settings
Now you can specify the details of your copy job:
- Black and white or colour?
- Paper size (e.g. A4 or A3)?
- Number of pages?
- Other settings offered by the device .
- 6. Start copying
Press the "Start" button to begin the copy job. The device will start working immediately.
- 7. Remove the statement and card
Once the copying process is complete, the statement appears on the device display.
Press the "END" button to finalise the process and get your chip card back.
Note: Make sure that you do not leave any personal items on the device!
These simple instructions make copying child's play - quick, efficient and uncomplicated!
Scan documents: This is how it works on a multifunction device
Multifunction devices offer you an easy way to digitise your documents. Follow these step-by-step instructions:
1. start: insert chip card
Go to a multifunction device and insert your chip card (student or employee ID card) into the red card slot without pressing it. The direction of the card doesn't matter - just insert it and you're ready to go.
2. select cost type
On the display of the device, select:
F1: Use business cost centre.
F2: Settlement via your private wallet.
3. select scanning
After successful login, the touchpad is activated.
- Select the "Send" function on the display. Then tap on "0001 SCAN".
4. Prepare documents
Insert your documents as follows:
- For multiple pages: Use the document feeder.
- For single pages or sensitive documents: Place them on the glass surface.
5. Adjust settings
Optimise your scan job by using the "Basic" function:
- Resolution: For sharp results .
- Colour or black and white: as required.
- Double-sided: If your documents are printed on both sides.
6. Start scanning
Press the "Start" button and the device will start scanning.
7. View the statement and remove the card
On completion of the scanning process, the terminal displays an overview of the costs incurred. Press the "END" button to finalise the process and get your chip card back
.8. Receive scanned documents
- By e-mail: Your scanned documents are automatically sent to your email address .
- Large files (> 5 MB): You will receive a download link instead.
⚠️ Important: The download is only possible within the campus network.
Note on downloads
The scanned documents are available to you for a maximum of 48 hours after the scan has been carried out. Plan accordingly to download the files in good time.
This guide will make scanning easier than ever before - digitise your documents in no time at all!
Prerequisites:
- Make sure that your device is either connected to the campus network via cable or has an active Eduroam WLAN connection.
- Download the following installation package → DOWNLOAD!
Installation steps:
Download the 1st installation package:
- Click on the download link to download the installation package
2. unzip the file:
- Unzip the downloaded `.zip` file on your device.
3. start installation:
- Execute the file `QPilot-Client-64bit-Setup-5.0.5.25707.exe`, which is located in the unzipped folder.

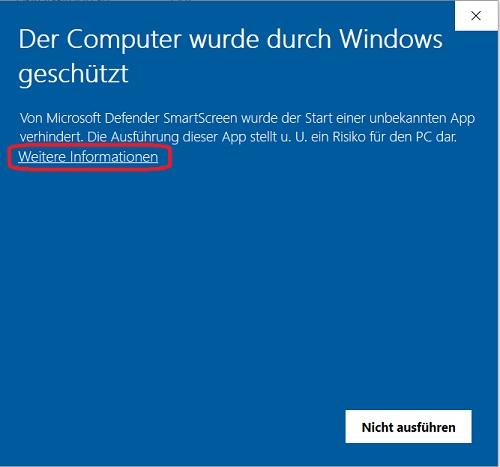
4. Exception rule for Microsoft Defender:
- If Microsoft Defender blocks the execution, click on "More information" and select "Run anyway" to continue the installation.
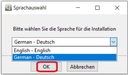
5. Select language:
- Select the desired language for the installation and then click on "OK".
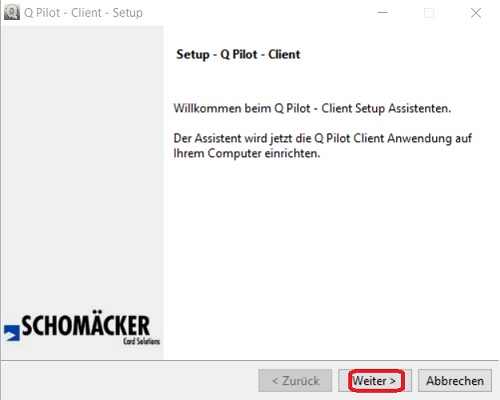
6. Continue installation:
- Click on "Next >" to continue with the installation.
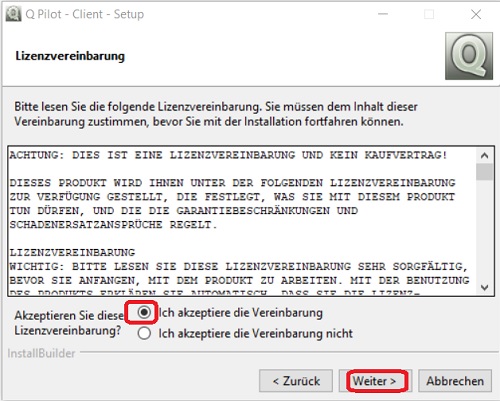
7. Accept the licence agreement:
- Read through the licence agreement, accept it and click on "Next >".
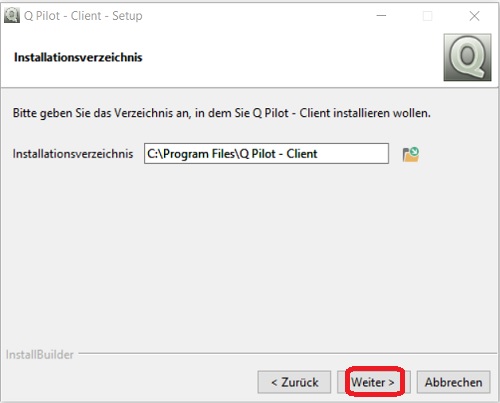
8. Confirm installation directory:
- Leave the suggested installation directory unchanged and click "Next >" twice to start the installation.
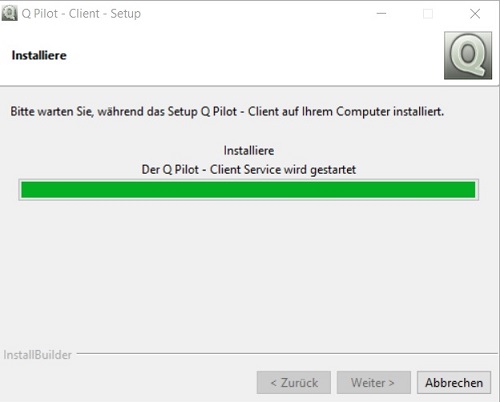
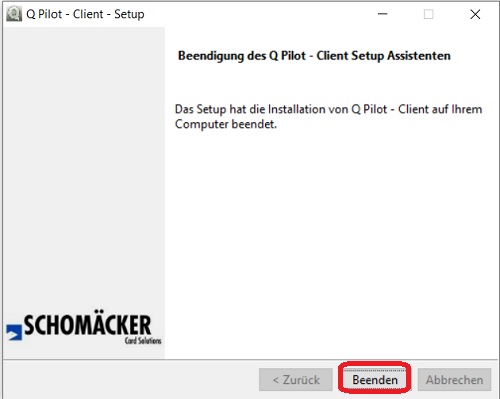
9. Completing the installation:
- The installation will now be completed automatically. Click on "Finish" to complete the process.
10. Restarting the computer:
- Restart your computer to apply the changes .
11. Check printer setup:
- After the restart, the printer "qpilotclient" should be in your printer list.
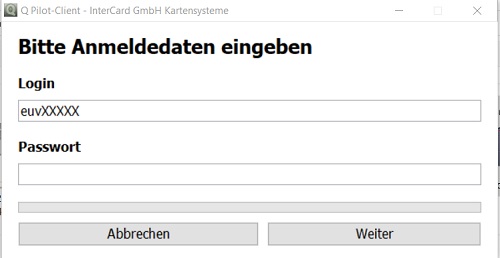
12th first print job:
- Your first print job to this printer will ask you to enter your Viadrina user details .
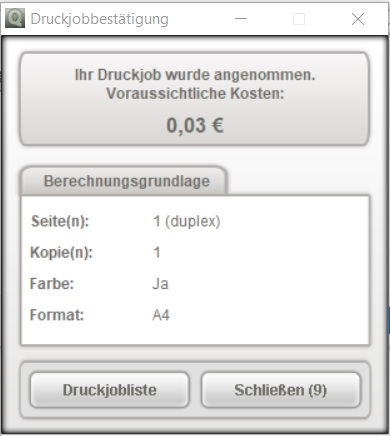
13th cost overview:
- A brief cost overview is displayed after each print job
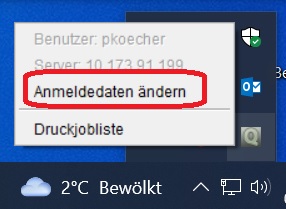
14. update user data:
- If your user data changes, you can update it using the "Q" icon in the taskbar at the bottom right.
Prerequisites:
- Your device must be connected to the campus network via cable or have an active Eduroam WLAN connection.
- Please download the following installation package → Mac_Universal_Driver.zip
Driver installation:
Download the installation package:
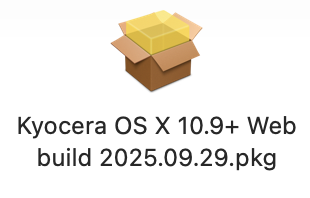
- Download `Mac56_2025.09.29-EN.zip`.
- Unzip the .zip file and open the contained `.dmg` file.
![]()
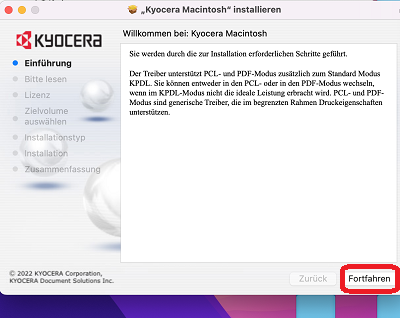
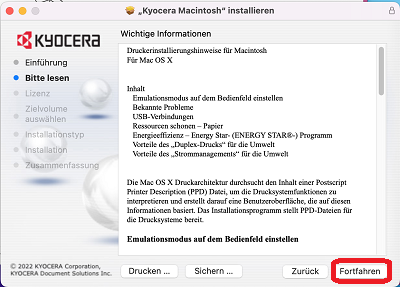
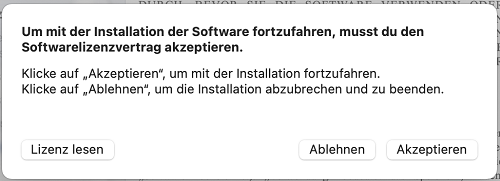
2. Install the driver software:
- Start the installer with the `.pkg` file.
- Follow the on-screen prompts: Click "Continue", "Accept" and "Install".


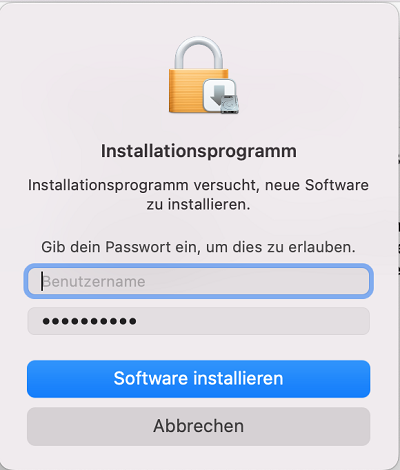
- If required, enter your administrator credentials to confirm the installation.
- This completes the driver installation.
Setting up the QPilot print client:
1. Please download this .zip File: DOWNLOAD!
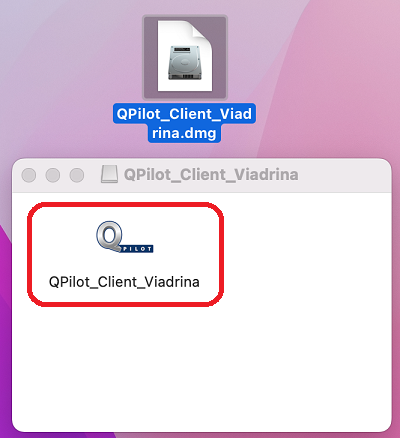
2. Install the QPilot client:
- Open an unzip the file "8.102.7.14_Uni-Viadrina_macos-client-notarized-27305M.zip" by double-clicking on it.

- Copy "QPilot Client (8.102.7.14_Uni_Viadrina).app" to your desktop or to your local file directory.
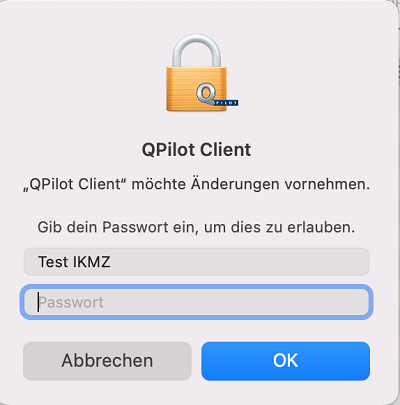
- Double-click to start the app. Confirm the permission with your admin data the first time you run it.
3. Print setup:
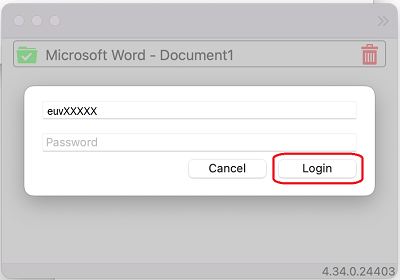
- The "qpilotClient" printer is now available to you.

- You must enter your Viadrina access data once for the first print job .
Note:
- After each restart of the device, the "QPilotClientViadrina.app" must be restarted in order to use the printer.
1. document format:
- Supported formats: PDF, DOC, DOCX
2nd steps for print job processing:
a. Call up the print portal:
- Open your browser and go to the URL: https://printing.europa-uni.de/
b. Log in:
- Log in with your Viadrina access data
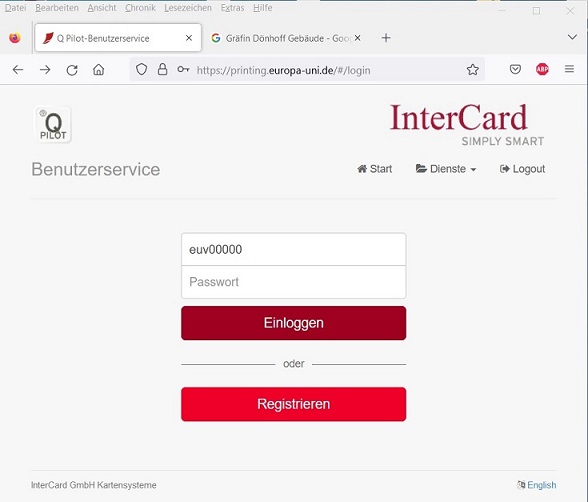
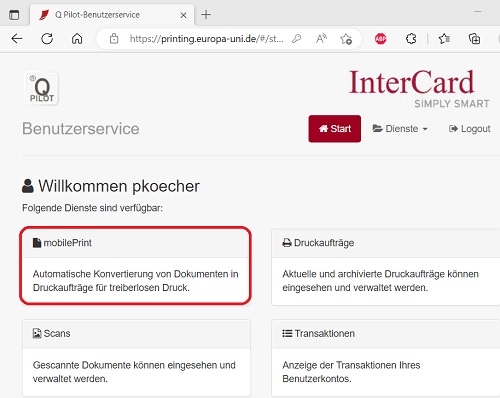
c. Select mobile print:
- Click on the "Mobile Print" option
d. Add files:
- Click on "Drop files or click" to open the file directory and select the desired documents.
- Alternatively, you can add documents using drag & drop.
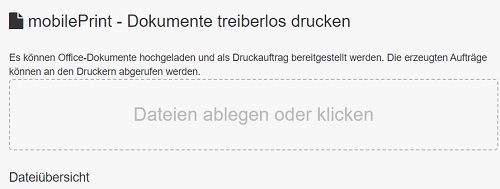
Important: Make sure that the uploaded documents are in PDF, DOC or DOCX format.
1. location:
- Go to one of the public car parks
2. Read in the map:
- Insert your card into the terminal
3. Select billing method:
- Press "F3" to settle the print jobs via your cost centre.
- Press "F4" to carry out billing via your private value exchange .
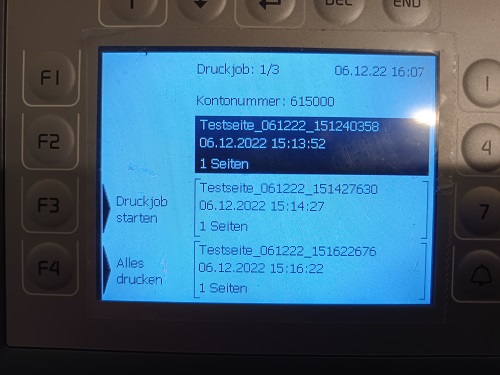
4. Start print job:
- Single print: Use the arrow keys to select an individual print job and start the printout with "F3".
- Total print: To print all listed print jobs one after the other, press "F4".
5th overview:
- After printing, you will see an overview of the printed pages.
6. Remove card:
- Press the "END" button on the terminal to retrieve your card.